Varnishing a painting does more than just make colours pop. It is the guard that shields your artwork from dust, sunlight and time itself. Most people reckon varnish is just a final touch but choosing the wrong varnish or skipping proper prep can actually ruin a painting that took months to create. Knowing the right way to protect your art can be the real difference between a faded canvas and a masterpiece that lasts for generations.
Table of Contents
- Step 1: Gather Necessary Materials And Tools
- Step 2: Prepare The Painting Surface For Varnishing
- Step 3: Choose The Right Varnish Type For Your Artwork
- Step 4: Apply The Varnish Evenly With Proper Technique
- Step 5: Allow To Dry And Verify The Finish
- Step 6: Store Or Display Your Varnished Painting Safely
Quick Summary
| Key Point | Explanation |
|---|---|
| 1. Gather essential varnishing tools | Collect specific materials like brushes, varnish, and a clean workspace to ensure quality application and protection. |
| 2. Prepare your painting surface thoroughly | Ensure the surface is free from dust and completely dry for optimal varnish adhesion and finish quality. |
| 3. Choose varnish suitable for medium | Select the correct varnish type—water-based for acrylics, oil-based for oils, and special varnishes for watercolours. |
| 4. Apply varnish with smooth strokes | Use long, controlled strokes and thin layers. Overlap slightly to avoid gaps and evenly cover the surface. |
| 5. Store or display artworks properly | Maintain stable temperature and humidity for preservation. Avoid direct sunlight and protect with acid-free materials. |
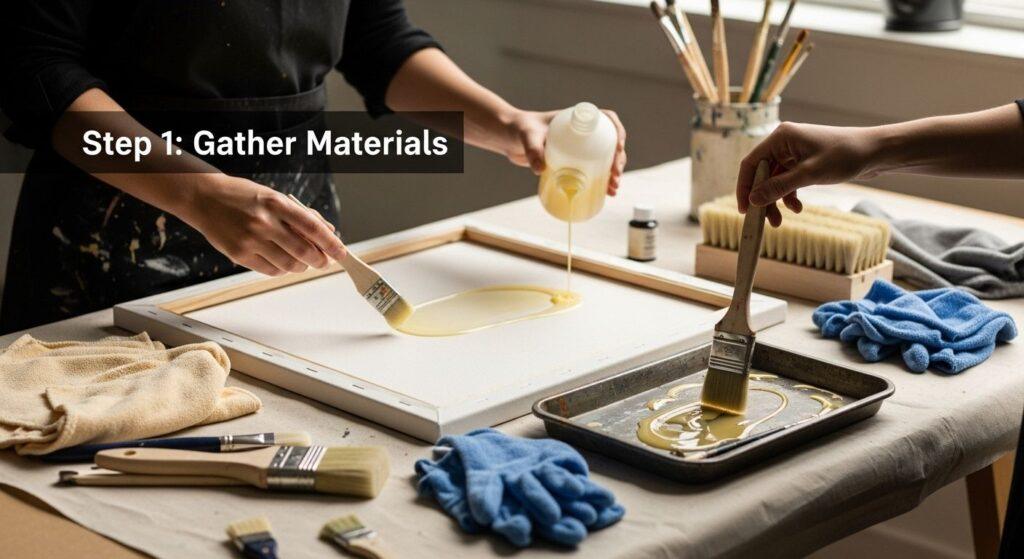
Step 1: Gather Necessary Materials and Tools
Varnishing a painting requires precision and the right set of materials to ensure your artwork receives lasting protection and a professional finish. This preparatory step is crucial in achieving a smooth, protective coating that will preserve your artistic work for years to come.
To begin, you will need to assemble a comprehensive collection of tools and materials specifically designed for painting varnishing. Select high-quality varnish appropriate for your painting’s medium – whether it’s an acrylic, oil, or watercolor artwork. Different paintings require different types of varnish, so understanding your artwork’s specific needs is paramount. Opt for professional-grade varnishes that offer UV protection and long-term preservation.
Your essential toolkit should include:
- Soft, lint-free natural bristle brushes (wide, clean, and specifically reserved for varnishing)
- High-quality clear varnish matched to your painting’s medium
- Clean, lint-free microfiber cloths
- Protective gloves
- Dust-free workspace with good ventilation
- Disposable drop cloth or protective surface covering
- Temporary drying rack or flat surface for artwork
Prepare your workspace meticulously by selecting a clean, dust-free area with consistent temperature and minimal air movement. Humidity and temperature can significantly impact varnish application, so aim for a controlled environment around 20-25 degrees Celsius with moderate humidity. Ensure your painting is completely dry and free from any dust or residue before beginning the varnishing process.
Read our guide on essential art supply basics to understand more about selecting the right materials for your artistic projects. By investing time in gathering the correct tools and preparing your workspace, you set the foundation for a successful varnishing experience that will protect and enhance your artwork’s longevity and visual appeal.
Step 2: Prepare the Painting Surface for Varnishing
Successful varnishing begins with meticulous surface preparation, a critical step that determines the final quality and durability of your artwork’s protective coating. The goal is to create an immaculate surface that allows the varnish to adhere smoothly and evenly, preventing potential imperfections or trapped debris that could compromise your painting’s finish.
Cleaning the painting surface requires exceptional care and gentle techniques. Start by allowing your artwork to completely dry and cure for at least 24 hours after its final painting session. Using a soft, clean microfiber cloth, gently remove any dust or loose particles by lightly sweeping across the surface. Avoid applying pressure or rubbing aggressively, which might damage delicate paint layers. For paintings with textured surfaces, use a soft, clean brush with extremely light strokes to dislodge any accumulated dust without disturbing the underlying paint.
Key verification steps to ensure your painting is ready for varnishing include:
- Surface is completely dry and cured
- No visible dust or debris on the painting
- Painting is at room temperature
- Artwork is placed on a stable, level surface
- Lighting allows you to see surface details clearly
Here is a handy checklist table summarising the critical steps to verify before proceeding with the varnishing process, helping you avoid common mistakes and achieve the best result.
| Verification Step | Why It Matters |
|---|---|
| Surface is completely dry and cured | Prevents smudging or lifting of paint |
| No visible dust or debris present | Ensures a flawless, smooth varnish coat |
| Painting is at room temperature | Prevents condensation and surface issues |
| Artwork placed on a stable, level surface | Avoids drips and uneven varnish |
| Lighting is adequate for inspection | Helps spot dust, streaks, or imperfections |
| Controlled humidity and temperature | Minimises drying issues and surface tension |
Temperature and humidity play crucial roles in preparing your painting for varnishing. Ensure your workspace maintains a consistent temperature between 20-25 degrees Celsius with moderate humidity. Extreme environmental conditions can cause varnish to dry unevenly or create unwanted surface tensions that might affect the final appearance. If your painting has been stored in a different environment, allow it to acclimatize to the room temperature for several hours before beginning the varnishing process.
Explore our comprehensive painting techniques guide to deepen your understanding of artwork preparation and preservation. Patience and attention to detail during this preparatory stage will significantly enhance the final protective varnish application, ensuring your artwork remains vibrant and well-preserved for years to come.
Step 3: Choose the Right Varnish Type for Your Artwork
Selecting the appropriate varnish is a nuanced process that directly impacts the longevity, appearance, and protection of your painting. Different painting mediums require specific varnish types, making this step crucial for preserving your artistic creation’s visual integrity and structural soundness.
Matching varnish to your painting medium requires careful consideration. For acrylic paintings, use a water-based acrylic varnish that provides flexibility and prevents cracking. Oil paintings demand traditional oil-based varnishes that offer superior protection and a rich, deep finish. Watercolor artworks require specialized, non-yellowing varnishes that maintain the delicate translucency of the original work. Professional artists recommend selecting varnishes specifically formulated for your painting’s base medium to ensure optimal protection and aesthetic preservation.
Consider these critical factors when choosing your varnish:
- Finish type (gloss, satin, or matte)
- UV protection capabilities
- Compatibility with painting medium
- Archival quality and long-term preservation
- Reversibility for future conservation
Varnish finishes dramatically influence your artwork’s visual presentation. Gloss varnishes create a vibrant, saturated appearance that enhances color depth and provides maximum protection. Satin finishes offer a balanced, subtle sheen that reduces glare while maintaining color richness. Matte varnishes create a soft, non-reflective surface ideal for artworks with intricate details or those displayed in brightly lit environments. Your chosen finish should complement the artwork’s original visual intent and display environment.
Below is a table comparing the main varnish types and their most suitable uses for each painting medium, as well as their unique benefits and typical finish options.
| Varnish Type | Best For | Benefits | Common Finish Options |
|---|---|---|---|
| Water-based Acrylic | Acrylic paintings | Flexible, prevents cracking, easy to clean | Gloss, satin, matte |
| Oil-based | Oil paintings | Superior protection, rich/deep finish | Gloss, satin, matte |
| Specialised (Non-yellowing) | Watercolours | Maintains delicate translucency, clarity | Satin, matte |
| UV-Protective | All painting types | Shields against fading and sun damage | Gloss, satin, matte |
| Archival Quality | Professional, all types | Long-term preservation, reversibility | Varies by type |
Explore our essential painting techniques for beginners to gain deeper insights into artwork preservation. Remember that investing time in selecting the right varnish is an investment in your artwork’s future, protecting your creative expression for generations to appreciate.
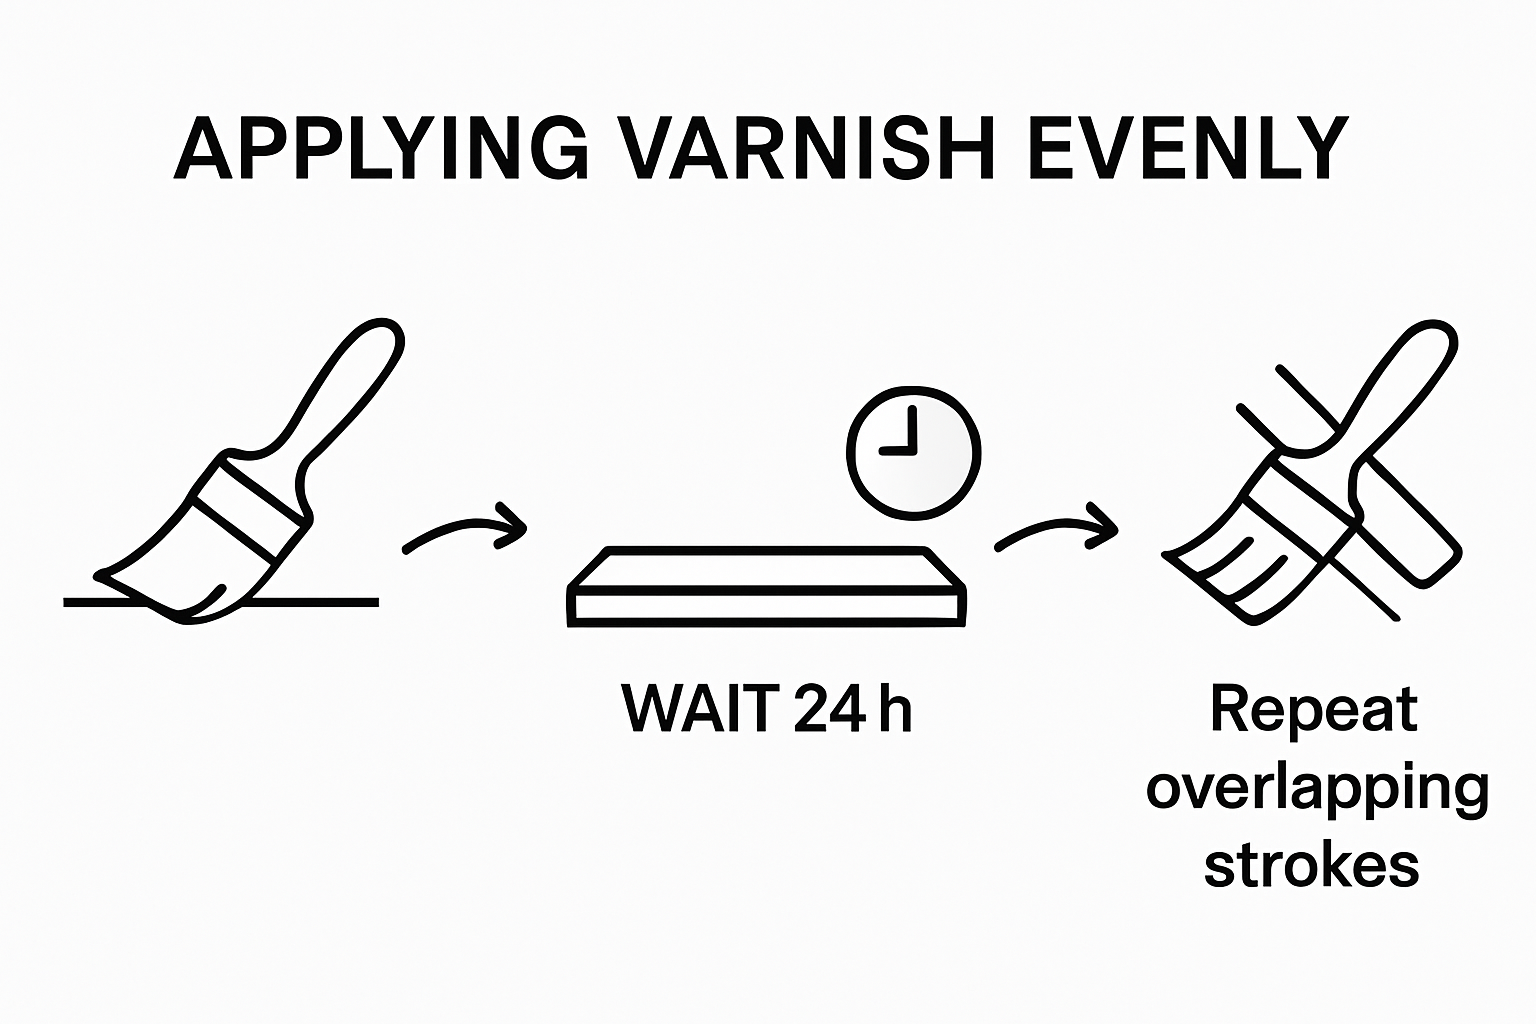
Step 4: Apply the Varnish Evenly with Proper Technique
Applying varnish is a delicate process that requires precision, patience, and a steady hand to ensure your artwork receives a flawless, protective finish. The technique you use will directly impact the final appearance and long-term preservation of your painting, making this step critical to your artwork’s aesthetic and structural integrity.
Prepare your workspace by ensuring a clean, dust-free environment with consistent temperature and minimal air movement. Position your painting horizontally on a stable, level surface covered with a clean drop cloth. Select a high-quality, soft natural bristle brush specifically reserved for varnishing, holding it at a comfortable angle that allows smooth, controlled strokes. Proper brush selection and handling are fundamental to achieving an even application.
Key application techniques to ensure a professional finish include:
- Use long, continuous strokes in a single direction
- Maintain a consistent, light pressure
- Overlap each stroke slightly to prevent gaps
- Work systematically across the entire surface
- Apply thin, multiple layers rather than one thick coat
Begin varnishing from one edge of the painting, using gentle, parallel strokes that follow the artwork’s natural orientation. Move the brush in consistent, smooth motions, avoiding back-and-forth scrubbing that can create uneven surfaces or trap air bubbles. Work quickly but carefully, as varnish begins to set relatively fast. For larger paintings, consider dividing the surface into manageable sections to maintain an even application. Allow each layer to dry completely before applying subsequent coats, typically waiting 24 hours between applications.
Explore our essential painting techniques for beginners to refine your artistic skills and preservation methods. Remember that patience and attention to detail during the varnishing process will protect and enhance your artwork’s beauty for years to come.
Step 5: Allow to Dry and Verify the Finish
The final stage of varnishing is perhaps the most critical, where patience and careful observation determine the ultimate success of your artwork’s protection and aesthetic enhancement. Allowing your painting to dry properly requires a controlled environment and a methodical approach to ensure the varnish sets perfectly without compromising the artwork’s delicate surface.
Create an ideal drying environment by placing the varnished painting in a dust-free, temperature-controlled space with minimal air movement. Maintain a consistent room temperature between 20-25 degrees Celsius, avoiding direct sunlight, heat sources, or areas with potential drafts. Temperature and air circulation are crucial factors that can significantly impact the varnish’s drying process and final appearance. Position the artwork horizontally on a clean, level surface, ensuring it remains undisturbed during the entire drying period.
Key verification steps for a successful varnish finish include:
- No visible dust particles or debris on the surface
- Uniform, consistent sheen across the entire painting
- No bubbles, streaks, or uneven areas
- Smooth texture without visible brush marks
- Colours appear vibrant and enhanced
Expect the initial drying phase to take approximately 24-48 hours, depending on the type of varnish and environmental conditions. Resist the temptation to touch or move the artwork during this time. Professional artists recommend waiting at least one week before handling or framing the painting to ensure complete curing. Careful observation during the drying process allows you to address any potential issues immediately. Look for any signs of uneven drying, trapped dust, or unexpected texture changes that might require gentle correction.
Discover more about sealing and protecting your artistic creations to enhance your preservation techniques. By investing time and attention in this final stage, you ensure your artwork remains protected, vibrant, and beautiful for years to come.
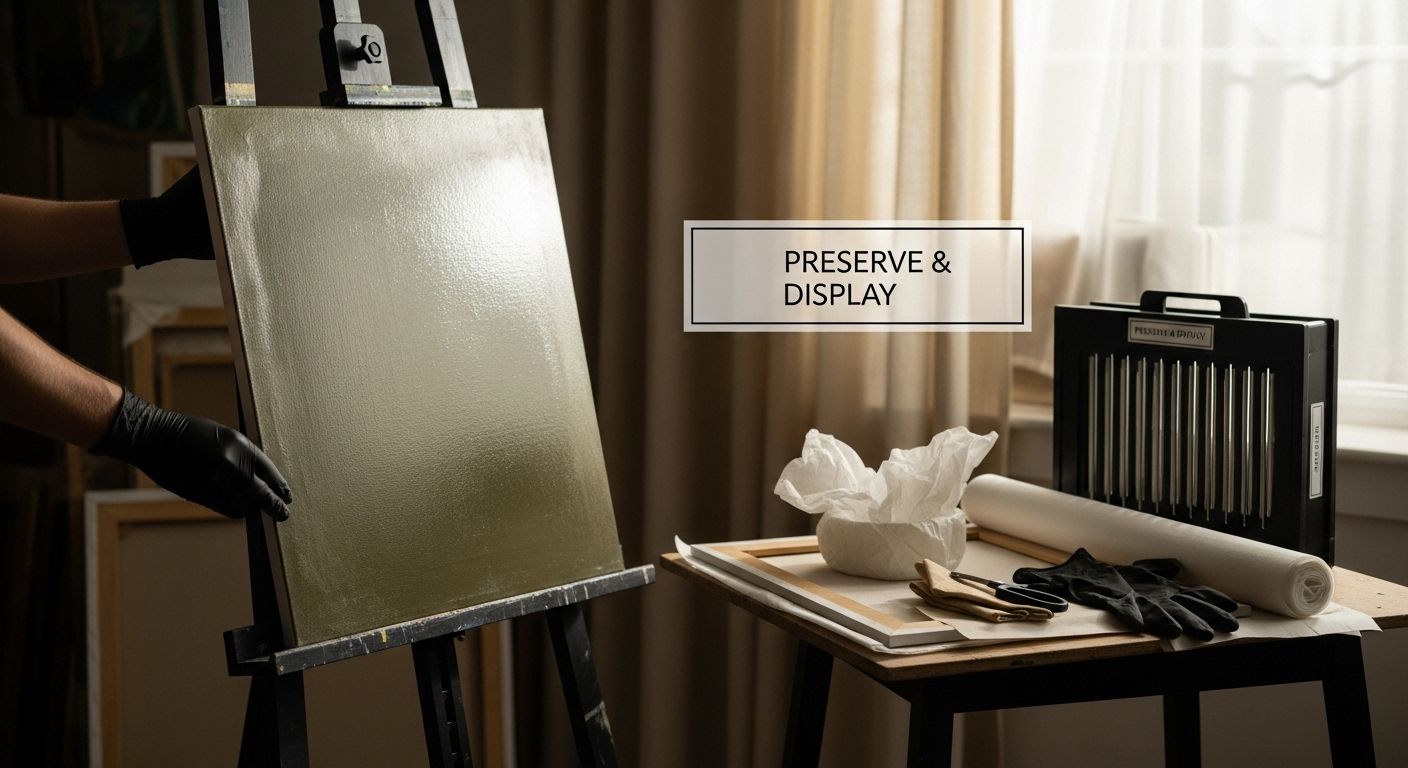
Step 6: Store or Display Your Varnished Painting Safely
After carefully varnishing your artwork, the final step involves protecting your masterpiece through thoughtful storage or display strategies that preserve its beauty and integrity. Proper preservation is crucial to maintaining the vibrant colors and protective varnish layer you have meticulously applied.
When selecting a display location, avoid direct sunlight and extreme environmental conditions. Choose areas with consistent temperature between 18-22 degrees Celsius and relative humidity around 45-55 percent. Paintings are sensitive to environmental fluctuations, so keep them away from heating vents, air conditioning units, windows, and areas prone to sudden temperature or moisture changes. Indirect, soft lighting provides the best illumination without risking color fading or surface damage.
Critical considerations for artwork preservation include:
- Keep artwork away from direct heat sources
- Maintain consistent room temperature
- Use acid-free backing materials
- Avoid hanging in humid spaces like bathrooms
- Handle artwork with clean, cotton gloves
For storage, invest in archival-quality materials that protect your painting from dust, moisture, and potential physical damage. Store paintings vertically in a dedicated art storage rack or cabinet, using acid-free spacers between canvases to prevent direct contact. Wrap paintings in soft, breathable materials like unbleached muslin or archival tissue paper to provide an additional protective barrier. When transporting or moving artwork, always support the frame or canvas edges, never touching the painted surface or varnished area.
Learn more about preserving your artistic creations to ensure your artwork remains a treasured piece for generations. By implementing these careful storage and display techniques, you safeguard not just a painting, but a piece of your creative expression.
Preserve Your Art with Confidence – Let Nothing Dull Your Creativity
You have learned just how critical it is to use the right varnish, tools, and careful techniques to protect your hard work and creativity. Many artists worry about damaging their precious paintings with the wrong supplies or struggling to keep out dust and fingerprints. If you want your artwork to stay vibrant, flawless and ready for display, you need reliable materials and expert support that simplify every step.

At Blue Pea Online, South Africa’s trusted arts and crafts store, you will find top-quality varnishes, lint-free brushes, protective gloves and everything else you need to follow the guidance from our varnishing article with total peace of mind. Discover how our wide selection of art supplies and authentic painting kits make it easy for every artist to achieve a professional finish. Secure lasting beauty for your original paintings – shop now for the right products and enjoy fast delivery across South Africa. Give your artwork the protection it deserves today.
Frequently Asked Questions
What type of varnish should I use for my oil painting?
For oil paintings, it’s best to use traditional oil-based varnishes to ensure superior protection and a rich finish that enhances the artwork’s depth.
How long should I wait after painting before varnishing?
It’s recommended to wait at least 24 hours after your final painting session to allow the artwork to dry completely before applying varnish.
Can I apply multiple layers of varnish?
Yes, applying multiple thin layers of varnish is advisable rather than a single thick coat. Ensure each layer dries completely before applying the next, typically waiting 24 hours between applications.
What environmental conditions are ideal for varnishing?
An ideal environment for varnishing is a clean, dust-free area with a consistent temperature between 20-25 degrees Celsius and moderate humidity. Avoid direct sunlight and air movement during the process.
