
Stencilling on wood is catching on all over South Africa. People love how quickly you can take plain boards and turn them into eye-catching, one-of-a-kind art. But hang on. Most folks make a massive mistake right from the start. If you pick the wrong wood or skip the right prep, even the best stencil can turn out messy or blurry. It is usually the tiniest prep steps that decide if your project turns heads or ends up in the scrap pile.
Table of Contents
- Choosing The Right Stencils And Wood
- Essential Tools And Materials For Stencilling
- Step-By-Step Guide To Using Stencils On Wood
- Avoiding Common Mistakes When Stencilling
Quick Summary
| Takeaway | Explanation |
|---|---|
| Choose the Right Wood | Fine-grain woods like birch and maple offer the smoothest surfaces for effective stenciling, ensuring clean and precise paint application. |
| Invest in Quality Tools | High-quality stencil brushes and acrylic paints are essential. Use firm, short-bristled brushes for precise application and control. |
| Follow Proper Preparation Steps | Sand the wood, apply a primer, and ensure the surface is clean and dry before stenciling to avoid paint bleeding and ensure crisp lines. |
| Use Minimal Paint Techniques | Employ a dry brush technique with minimal paint to prevent bleeding and achieve sharp designs on your wood pieces. |
| Secure Stencils Effectively | Use low-tack painter’s tape or temporary spray adhesive to position stencils firmly, avoiding gaps that allow paint seepage. |
Choosing the Right Stencils and Wood
Selecting the perfect materials is crucial when using stencils on wood. The right combination of stencil and wood surface can transform an ordinary craft project into a stunning piece of art. Understanding the nuances of material selection will help crafters achieve crisp, professional results.
Wood Surface Selection
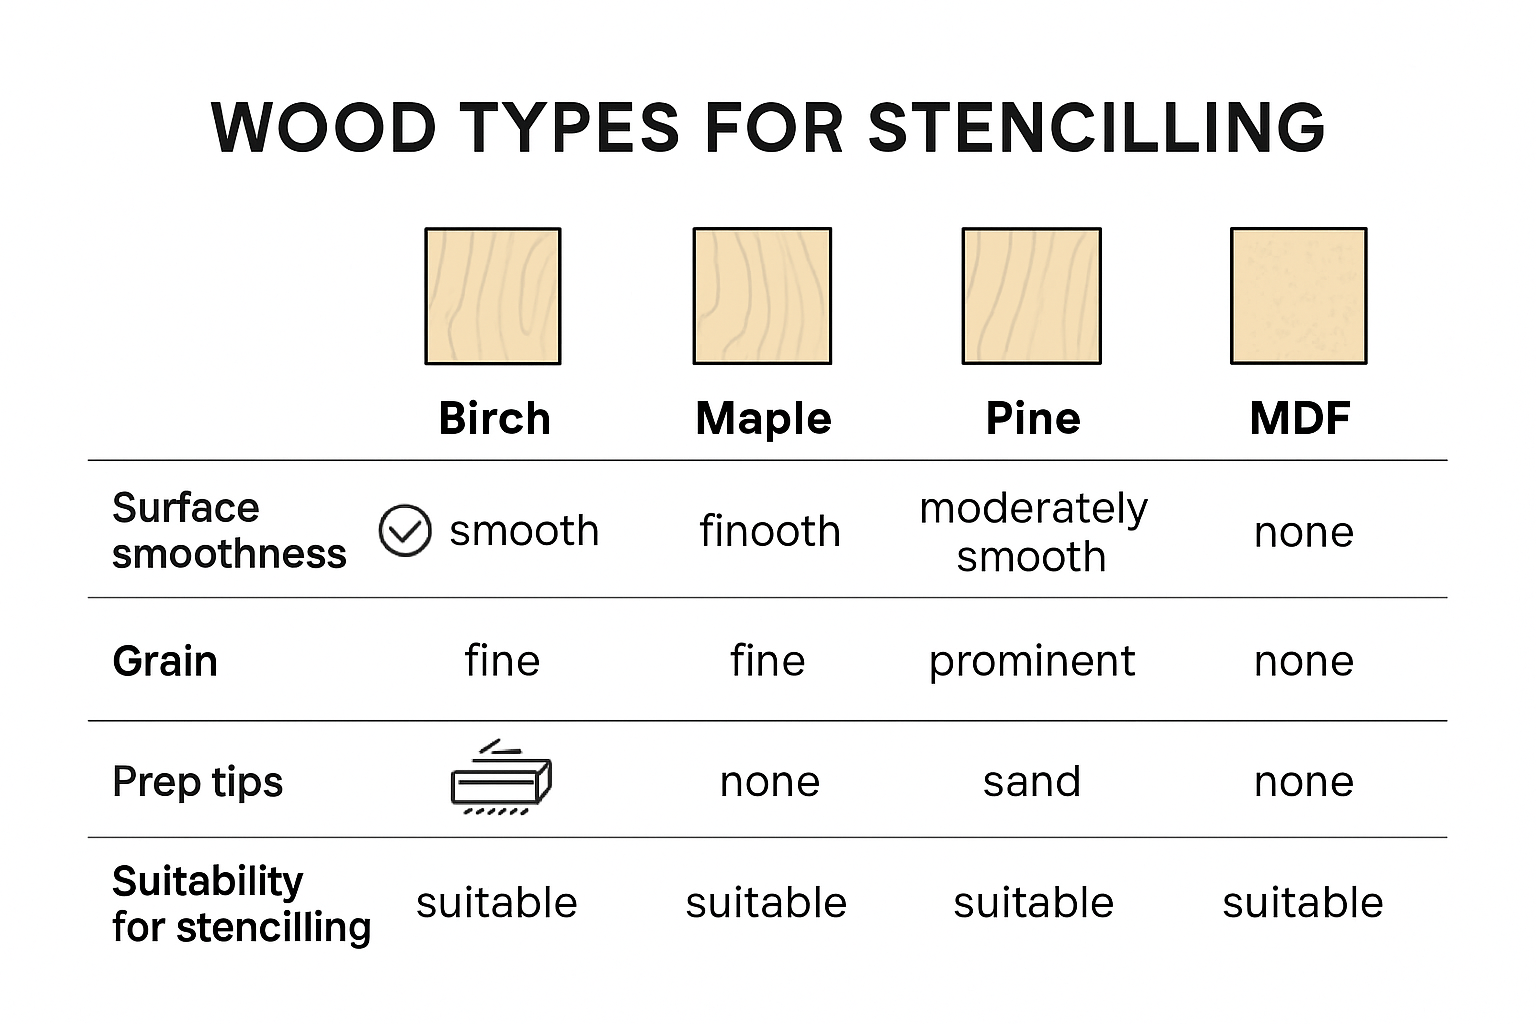
Not all wood surfaces are created equal when it comes to stenciling. According to the USDA Forest Service publication, certain wood types provide superior results for artistic projects. Fine-grain woods like birch and maple offer the smoothest surfaces for stencil work. These woods have minimal texture variations, allowing for clean, precise paint application.
When choosing wood, consider these key characteristics:
- Smoothness: Surfaces with minimal grain interruption
- Moisture Content: Properly dried wood prevents paint bleeding
- Surface Preparation: Sanding and sealing are critical steps
Beginners often overlook the importance of wood preparation. A light sanding creates a uniform surface that helps stencil paint adhere more effectively. Professional crafters recommend using 220-grit sandpaper to create an ideal painting surface.
Stencil Material Considerations
Stencil quality directly impacts the final artwork. Crafters should invest in durable materials that maintain crisp edges and resist paint bleeding. Mylar and plastic stencils offer excellent durability and reusability compared to paper alternatives. Thicker stencils provide more stability during painting, reducing the risk of paint seeping underneath the design.
Key factors when selecting stencils include:
- Material Thickness: Thicker stencils provide better paint control
- Design Complexity: Intricate patterns require higher quality materials
- Intended Use: Some stencils work better for specific painting techniques
Preparation Techniques for Success
Professional crafters understand that preparation makes the difference between amateur and polished results. Research from woodworking experts suggests using a wood sealer before stenciling to create a smooth, uniform surface. This step prevents paint from bleeding and ensures crisp, clean lines.
Recommended preparation steps:
- Sand the wood surface thoroughly
- Apply a wood primer or sealer
- Allow the surface to dry completely
- Secure the stencil using low-tack painter’s tape
- Use minimal paint on your brush to prevent bleeding
South African crafters can achieve professional-looking results by paying close attention to these material and preparation details. The right combination of smooth wood, quality stencils, and careful technique will elevate any wood crafting project from simple to spectacular.
To make it easier to compare key considerations for wood and stencil choices, here’s a handy summary table:
| Feature | Ideal Wood Surface | Ideal Stencil Material |
|---|---|---|
| Smoothness | Fine-grain woods (birch, maple) | Mylar or thick plastic |
| Durability | Properly dried, sealed | Reusable, thick material |
| Preparation Needed | Sanding, sealing/priming | Clean, crisp edges |
| Risk of Bleeding | Low if prepped well | Low (when thick & secured) |
| Reusability | Multiple if well finished | High with plastic/Mylar |
Essential Tools and Materials for Stencilling
Stencilling on wood requires a carefully curated collection of tools and materials to ensure professional and precise results. Understanding the right equipment will help South African crafters create stunning wood projects with confidence and skill.
Basic Stencilling Tools
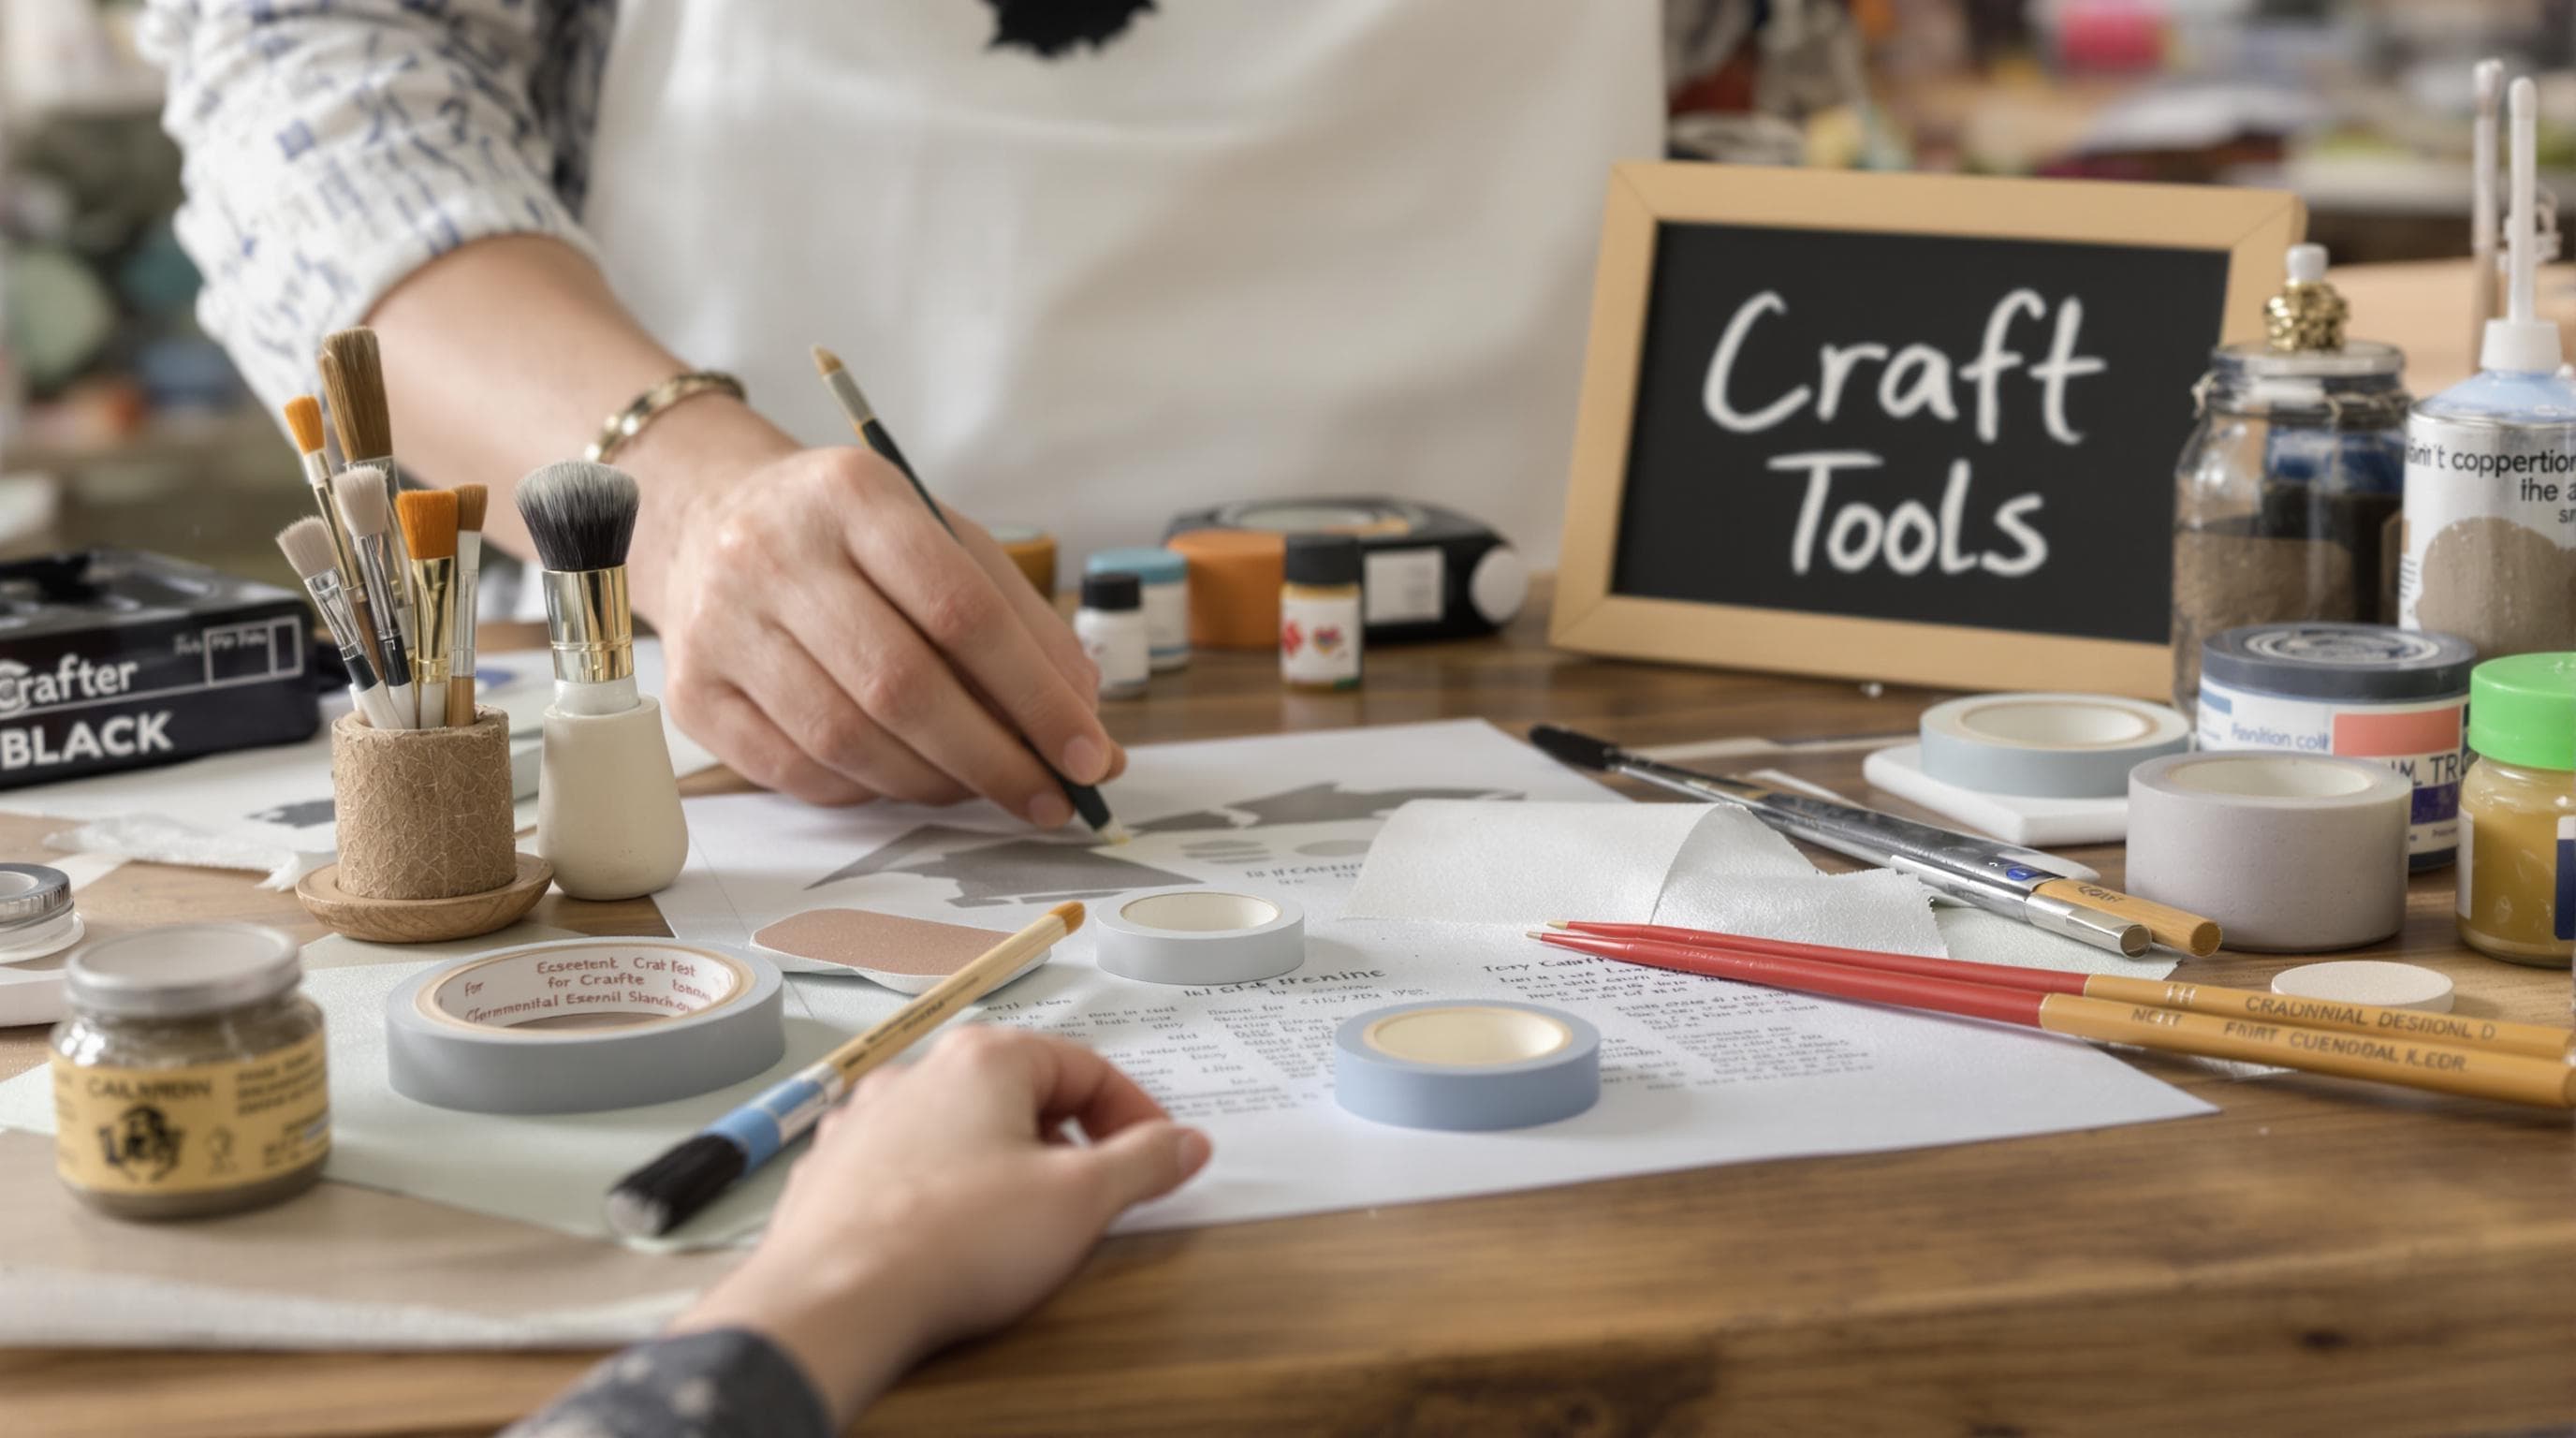
Every crafter needs a fundamental toolkit for successful wood stencilling. Professional artists recommend gathering specific tools before starting any project. Essential items include high-quality stencil brushes with firm, short bristles that allow precise paint application. Craft research from professional woodworking experts indicates that synthetic bristle brushes work best for acrylic and water-based paints, providing crisp edges and minimal paint bleed.
Key basic tools include:
- Stencil Brushes: Specialized brushes with rounded, stubby tips
- Low-Tack Painter’s Tape: For securing stencils without damaging surfaces
- Disposable Palette: For mixing and managing paint quantities
- Fine-Grit Sandpaper: To prepare wood surfaces
Paint and Paint Application Materials
Choosing the right paint is crucial for achieving professional stencilling results. According to wood crafting specialists, acrylic paints offer the best performance on wood surfaces. These paints provide excellent coverage, quick drying times, and minimal bleeding when used with proper techniques.
Recommended paint types include:
- Acrylic Craft Paints: Versatile and easy to use
- Chalk-Based Paints: Provide excellent matte finishes
- Specialized Wood Paints: Designed for enhanced wood adhesion
Professional crafters suggest using foam daubers or specialized stencil brushes for paint application. These tools help control paint volume and prevent excess moisture that could cause bleeding or smudging.
Additional Protective and Finishing Materials
Beyond basic painting tools, crafters should invest in protective and finishing materials. Wood sealers and clear topcoats help preserve stencilled designs and protect the underlying wood surface. You can learn more about enhancing your craft techniques with additional finishing methods.
Protective materials include:
- Wood Primer: Creates smooth painting surface
- Clear Sealant: Protects finished design
- Protective Gloves: Prevents paint stains
- Drop Cloths: Maintains workspace cleanliness
South African crafters can build their stencilling toolkit gradually, investing in quality tools that will support multiple projects. Proper equipment transforms wood stencilling from a challenging task to an enjoyable creative experience, enabling artists to produce professional-looking pieces with consistent results.
To help you assemble your stencilling toolkit, the following table summarises the essential tools and materials mentioned in this section, along with their main uses:
| Tool/Material | Purpose/Use |
|---|---|
| Stencil Brushes | Precise paint application |
| Foam Daubers | Even, light paint dab on stencil |
| Low-Tack Painter’s Tape | Secure stencils without residue |
| Fine-Grit Sandpaper | Smooth wood surface before painting |
| Disposable Palette | Mixing small batches of paint |
| Wood Primer/Sealer | Prepares wood, prevents paint bleeding |
| Acrylic/Chalk Paints | Provide strong colour and quick drying |
| Clear Topcoat Sealant | Protects finished stencilled design |
| Protective Gloves | Keeps hands clean |
| Drop Cloth | Workspace protection |
Step-by-Step Guide to Using Stencils on Wood
Creating beautiful wood art with stencils requires precision, patience, and a systematic approach. South African crafters can transform ordinary wooden surfaces into stunning decorative pieces by following a carefully planned process that ensures professional-looking results.
Preparing Your Wood Surface
HowStuffWorks recommends starting with thorough surface preparation. Begin by sanding the wood surface completely, removing any rough edges or existing finishes. Use fine-grit sandpaper to create a smooth, uniform surface that will help the stencil and paint adhere effectively.
Key preparation steps include:
- Cleaning: Remove all dust and debris after sanding
- Priming: Apply a wood primer to create an even base
- Drying: Allow the primer to dry completely before stenciling
Professional crafters suggest using a tack cloth to remove fine dust particles after sanding, ensuring an ultra-smooth surface for your stencil work.
Stencil Positioning and Application
According to builders and woodworking experts, positioning is critical for successful stenciling. Use low-tack painter’s tape to secure the stencil firmly to the wood surface. This prevents movement during painting and ensures crisp, clean lines.
Techniques for perfect stencil placement:
- Tape Securement: Use painter’s tape on multiple edges
- Alignment: Measure and mark guidelines if needed
- Minimal Paint: Use a dry brush technique to prevent bleeding
For intricate designs, consider using spray adhesive to temporarily hold the stencil in place. This method provides additional stability for complex patterns.
Painting and Finishing Techniques
eHow provides detailed guidance on painting techniques that prevent common mistakes. Use a stencil brush or foam dauber with minimal paint to avoid bleeding under the stencil edges. Dab the paint lightly and consistently, building up color gradually rather than applying a heavy single coat.
Advanced painting tips:
- Brush Technique: Use a stippling motion instead of brushing
- Paint Quantity: Remove excess paint before application
- Layer Carefully: Build color in thin, even layers
After completing the stencil design, allow the paint to dry completely. Consider applying a clear sealant to protect the artwork and read more about enhancing your craft techniques.
South African crafters can achieve professional-looking results by following these systematic steps. Patience and attention to detail transform simple wood surfaces into personalized art pieces that showcase individual creativity and skill.
Below is a simple process table summarising the key step-by-step actions for successful wood stencilling, so you can quickly reference what to do at each stage:
| Step | Action | Purpose |
|---|---|---|
| 1 | Sand wood surface | Create smooth, uniform base |
| 2 | Clean with tack cloth | Remove dust/particles for better adherence |
| 3 | Apply wood primer or sealer | Prevent paint bleeding |
| 4 | Let surface dry completely | Ensure readiness for stencilling |
| 5 | Position & secure stencil with tape/adhesive | Prevent stencil movement/paint seepage |
| 6 | Apply minimal paint with stencil brush | Achieve crisp, defined edges |
| 7 | Build colour in light layers | Avoid bleeding and blotchiness |
| 8 | Remove stencil after drying | Reveal clean design |
| 9 | Seal finished design | Protect artwork & enhance durability |
Avoiding Common Mistakes When Stencilling
Stencilling on wood can be challenging for beginners and experienced crafters alike. Understanding and anticipating common pitfalls helps South African artists create professional-looking wood art with confidence and precision.
Paint Application Errors
Professional craft experts highlight that improper paint application is the most frequent source of stencilling disappointment. Overloading brushes with paint leads to bleeding, blurring, and uneven designs. The key is using a minimal amount of paint and employing a dry brush technique.
Common paint application mistakes include:
- Excessive Paint: Creates undefined edges and smudges
- Inconsistent Pressure: Results in uneven color distribution
- Wrong Brush Technique: Brushing instead of stippling causes design distortion
Professional crafters recommend practicing paint control on scrap wood before attempting final projects. This approach helps develop muscle memory and understanding of proper technique.
Stencil Positioning and Adhesion
Woodworking specialists emphasize the critical importance of precise stencil placement. Poorly secured stencils create gaps, allowing paint to seep underneath and ruining design integrity. Using low-tack painter’s tape or temporary spray adhesive ensures clean, crisp lines.
Key positioning strategies:
- Secure Edges: Use multiple tape points to prevent movement
- Smooth Surface Contact: Ensure stencil lies flat against wood
- Alignment Checks: Measure and mark guidelines before application
For intricate or multi-layer designs, consider using registration marks to maintain consistent positioning between paint layers.
Surface Preparation and Finishing Mistakes
Improper wood surface preparation can compromise the entire stencilling project. Craft research reveals that skipping sanding, using inappropriate primers, or failing to seal finished work leads to poor results.
Critical preparation and finishing considerations:
- Incomplete Sanding: Creates uneven paint absorption
- Skipping Primer: Reduces paint adhesion and durability
- Neglecting Sealant: Leaves artwork vulnerable to damage
South African crafters can explore advanced painting techniques to elevate their stencilling skills and avoid these common errors.
Mastering wood stencilling requires patience, practice, and attention to detail. By understanding and proactively addressing these potential mistakes, artists can transform simple wooden surfaces into stunning, professional-quality artwork that reflects their creativity and skill.
Frequently Asked Questions
What type of wood is best for stencilling?
Fine-grain woods like birch and maple are ideal for stencilling due to their smooth surfaces, ensuring clean and precise paint application.
How do I prepare wood for stencilling?
To prepare wood for stencilling, sand the surface with fine-grit sandpaper, clean with a tack cloth, and apply a wood primer or sealer before stencilling to prevent paint bleeding.
What are the best paints to use for stencilling on wood?
Acrylic craft paints are recommended for stencilling on wood as they provide excellent coverage, quick drying times, and minimize bleeding when applied with the right techniques.
How can I avoid paint bleeding when stencilling?
To avoid paint bleeding, use a dry brush technique with minimal paint, secure stencils properly, and avoid excessive pressure during application.
Ready to Stencil Like a Pro? Upgrade Your Crafting Game Here
Ever spend hours prepping your wood or positioning your stencil, only for blurry paint or stubborn bleeding to spoil the result? The tips in our article show how small mistakes can easily ruin your stencilling project. Attention to detail and having the right tools make all the difference if you want crisp, lasting designs that catch the eye. If you want to turn every wood project into a work of art, you need quality supplies that take the hassle out of prep and painting.

Give your next project the professional edge with premium stencils, durable paints, and reliable finishing products from South Africa’s top source for crafters. Make those sharp lines and bold patterns a reality by exploring our collection at Blue Pea Online. Want to start with a ready-to-go kit or find everything for stencilling in one place? Visit our home page and find the resources, advice, and supplies you need now. There is no reason to let simple mistakes hold you back. Shop today for the best stenciling results you have ever had.
