Painting on wood seems simple enough, right? Grab a paintbrush and get moving. But hold on. Did you know that the type of wood you pick can make or break your entire project and even affect how long the paint sticks? Most people focus on colour choice, but the real secret lies in the preparation. That first step matters more than any fancy tool or trendy paint out there.
Table of Contents
- Step 1: Choose Your Wood And Prepare The Surface
- Step 2: Select The Right Paint And Tools
- Step 3: Apply A Primer For Better Adhesion
- Step 4: Paint Your Design With Care
- Step 5: Seal And Protect Your Artwork
Quick Summary
| Key Point | Explanation |
|---|---|
| 1. Choose the right wood type | Select between softwoods for crafting and hardwoods for durability while avoiding damaged wood. |
| 2. Thoroughly prepare the wood surface | Sand the wood to ensure a smooth finish and clean any dust before priming and painting. |
| 3. Apply primer for better adhesion | Use a suitable primer to create a uniform base and prevent color bleed-through for a lasting finish. |
| 4. Use multiple paint layers | Apply thin coats of paint, starting with lighter colours, allowing proper drying time between layers for an even finish. |
| 5. Seal artwork for protection | Apply a clear sealant to enhance colour vibrancy and protect your painting from moisture and UV damage. |
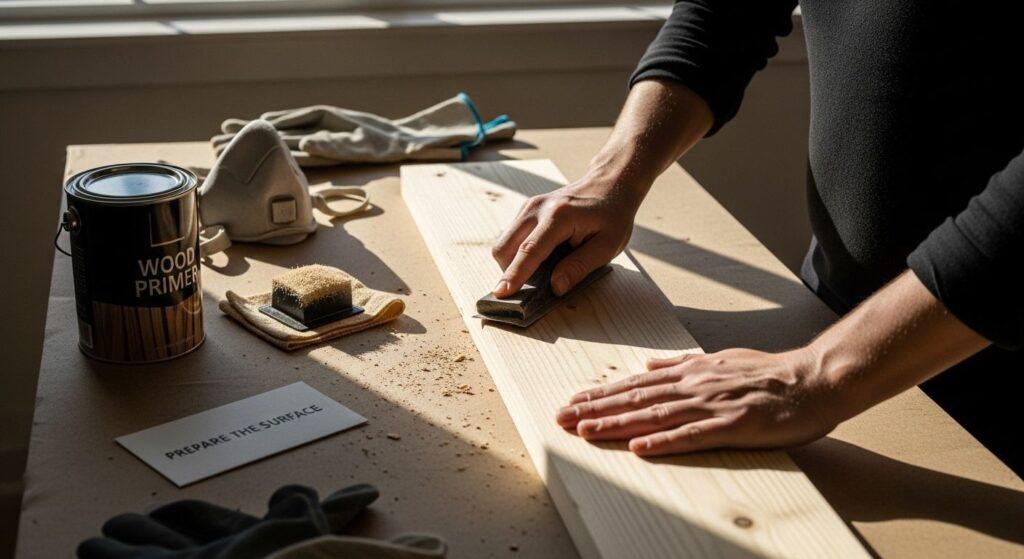
Step 1: Choose Your Wood and Prepare the Surface
Successful wood painting begins with selecting the right surface and preparing it meticulously. The quality of your preparation directly impacts how beautifully and durably your paint will adhere to the wood. Your goal in this initial step is to create a smooth, clean canvas that will showcase your artistic vision.
When selecting wood for your project, consider the type and condition carefully. Softwoods like pine and cedar are popular for crafting because they’re affordable and readily available, while hardwoods like oak and maple offer more durability and a refined finish. Avoid wood with significant knots, warping, or moisture damage, as these imperfections can compromise your painting results.
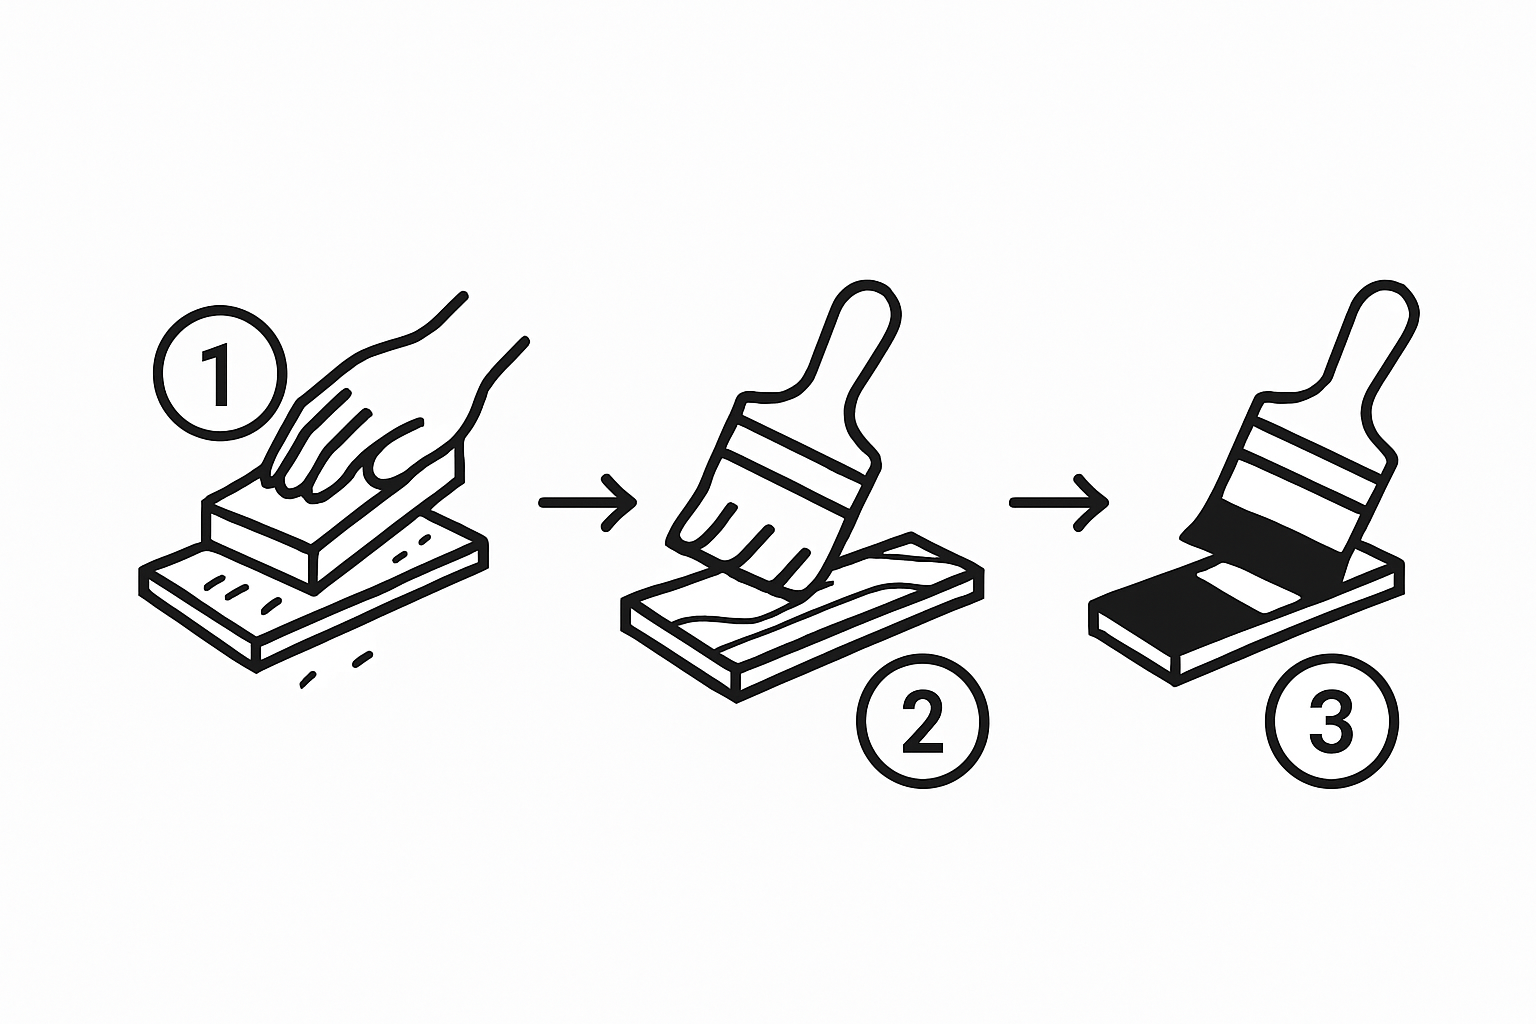
Before you begin painting, thorough surface preparation is crucial. Start by inspecting the wood for any rough spots, splinters, or existing paint. Use medium-grit sandpaper (120-150 grit) to create a uniform surface, always sanding in the direction of the wood grain. This process not only smooths the surface but also helps the primer and paint adhere more effectively. Wear protective gloves and a dust mask during sanding to protect yourself from wood particles.
After sanding, remove all dust using a tack cloth or a slightly damp cloth. Allow the wood to dry completely. For best results, explore our wood preparation techniques that ensure a professional finish. If you’re working with raw, untreated wood, apply a wood primer to seal the surface and create an ideal base for your paint. Choose a primer compatible with both your wood type and the paint you’ll be using.
Verify your surface is ready by running your hand across the wood – it should feel smooth and even, with no rough patches or loose particles. A well-prepared surface will help your paint glide on smoothly and create a professional-looking final product.
Step 2: Select the Right Paint and Tools
Choosing the appropriate paint and tools is a critical step that can make or break your wood painting project. Your selection will determine the final appearance, durability, and overall quality of your artwork. Understanding the nuances of paint types and their compatibility with wood surfaces is essential for achieving professional results.
Acrylic paints are the most versatile and popular choice for wood crafting. They dry quickly, offer vibrant colors, and adhere well to most wood surfaces. For outdoor projects or pieces that might encounter moisture, consider water-resistant acrylic paints or adding a protective sealant. Alternatively, oil-based paints provide a more durable finish but require longer drying times and more complex cleanup.
When selecting tools, invest in quality brushes that match your paint type. Synthetic brushes work best with acrylic paints, while natural bristle brushes are ideal for oil-based paints. explore our painting techniques for crafters to refine your approach. A basic toolkit should include:
- Flat brushes for broad, even coverage
- Round brushes for detailed work and fine lines
- Foam brushes for smooth, streak-free application
- Paint palette or disposable plate for mixing colors
- Paint mixing sticks
- Painter’s tape for clean edges
Pay attention to the paint finish as well. Matte finishes provide a soft, non-reflective look perfect for rustic or vintage projects. Satin and semi-gloss finishes offer a subtle sheen, while high-gloss paints create a dramatic, reflective surface. Test your chosen paint on a small, inconspicuous area of wood first to ensure color and finish meet your expectations.
To verify your paint and tools are suitable, check that the colors are true, brushes are clean and intact, and the paint consistency is smooth without lumps. A successful selection means you’re ready to transform your prepared wood surface into a stunning piece of art.
Below is a summary table of main paints and tools discussed, helping you quickly match each item to its purpose and recommended use on wood.
| Item | Type/Specification | Recommended For | Purpose/Use |
|---|---|---|---|
| Acrylic paint | Water-based, quick-drying | Most wood projects, especially indoors | Offers vibrant colour, easy clean-up |
| Oil-based paint | Longer drying, strong adhesion | Outdoor or high-durability pieces | Durable finish, weather-resistant |
| Flat brush | Synthetic or natural bristle | Base coats and broad surfaces | Even, wide coverage |
| Round brush | Fine tip | Details and line work | Precision and intricate work |
| Foam brush | Soft foam | Smooth coverage | Streak-free, uniform finishes |
| Painter’s tape | Low-tack adhesive | Creating sharp edges | Prevents paint bleed for clean lines |
| Paint palette | Plastic or disposable plate | Mixing paints | Blending colours before application |
| Mixing sticks | Wood or plastic | All projects | Stirring and combining paint properly |
Step 3: Apply a Primer for Better Adhesion
Priming is the unsung hero of wood painting, creating a critical foundation that ensures your paint looks professional and lasts longer. Think of primer as a bridge between your prepared wood surface and the final paint color, providing a uniform base that enhances color vibrancy and paint durability. Skipping this step can lead to uneven absorption, poor color coverage, and premature paint deterioration.
Wood primers come in different formulations, each designed for specific wood types and painting conditions. For bare or previously unpainted wood, use a water-based latex primer that seals the wood’s porous surface and creates a smooth canvas for your paint. If you’re working with wood that has existing paint or stains, choose a stain-blocking primer to prevent previous colors or wood tannins from bleeding through your new paint layer.
Before applying primer, ensure your workspace is well-ventilated and maintain a consistent room temperature between 10-25 degrees Celsius. Stir the primer thoroughly to prevent uneven application, and use a high-quality synthetic brush or foam roller for the most uniform coverage. learn more about professional wood painting techniques to refine your approach.
Apply the primer using long, smooth strokes that follow the wood grain. Start at one edge and work systematically across the surface, overlapping each stroke slightly to prevent missed spots. A single thin coat is often sufficient, but some surfaces might require two light coats for complete coverage. Allow each coat to dry completely according to the manufacturer’s instructions, typically 1-2 hours, before lightly sanding with fine-grit sandpaper to remove any small imperfections.
To verify your primer application is successful, check for these key indicators:
- Uniform, smooth surface with no visible wood grain or previous color showing through
- No visible brush or roller marks
- Consistent color and texture across the entire wood surface
- No drips, bubbles, or uneven patches
A well-primed surface will feel smooth to the touch and provide the perfect foundation for your upcoming paint layers, ensuring a professional and long-lasting finish.
Step 4: Paint Your Design with Care
Painting on wood is an art form that requires patience, precision, and a thoughtful approach. This step transforms your prepared surface into a vibrant canvas, turning your creative vision into reality. The key to success lies in understanding how to apply paint methodically and strategically.
Start with your lightest colors and work progressively towards darker shades. This technique allows for easier blending and helps prevent color contamination. Begin by loading your brush with a small amount of paint, wiping off excess to avoid drips and ensure controlled application. Use long, smooth strokes that follow the wood grain, maintaining consistent pressure to create an even layer. If you’re working on a detailed design, consider using smaller brushes for precision and larger brushes for broader coverage.
Apply paint in thin, multiple layers rather than one thick coat. This approach prevents paint from pooling, reduces drying time, and allows for better color depth and texture. discover advanced painting techniques for wood crafts to elevate your skills. Allow each layer to dry completely before adding the next, typically waiting 15-30 minutes between coats. Use this time to clean your brushes and prepare your next color palette.
For intricate designs or specific patterns, consider using painter’s tape to create clean edges and protect areas you don’t want painted. Stencils can also provide guidance and help maintain crisp lines. If you’re blending colors, work quickly while the paint is still wet, using a clean brush to softly merge different hues.
To verify your painting technique is successful, check for these key indicators:
- Smooth, even color coverage without visible brush strokes
- No drips, pooling, or uneven paint thickness
- Colors that appear vibrant and true to your original design
- Edges and lines that are clean and well-defined
Remember that painting is as much about technique as it is about creativity. Take your time, enjoy the process, and don’t be afraid to experiment with different brush techniques and color combinations.
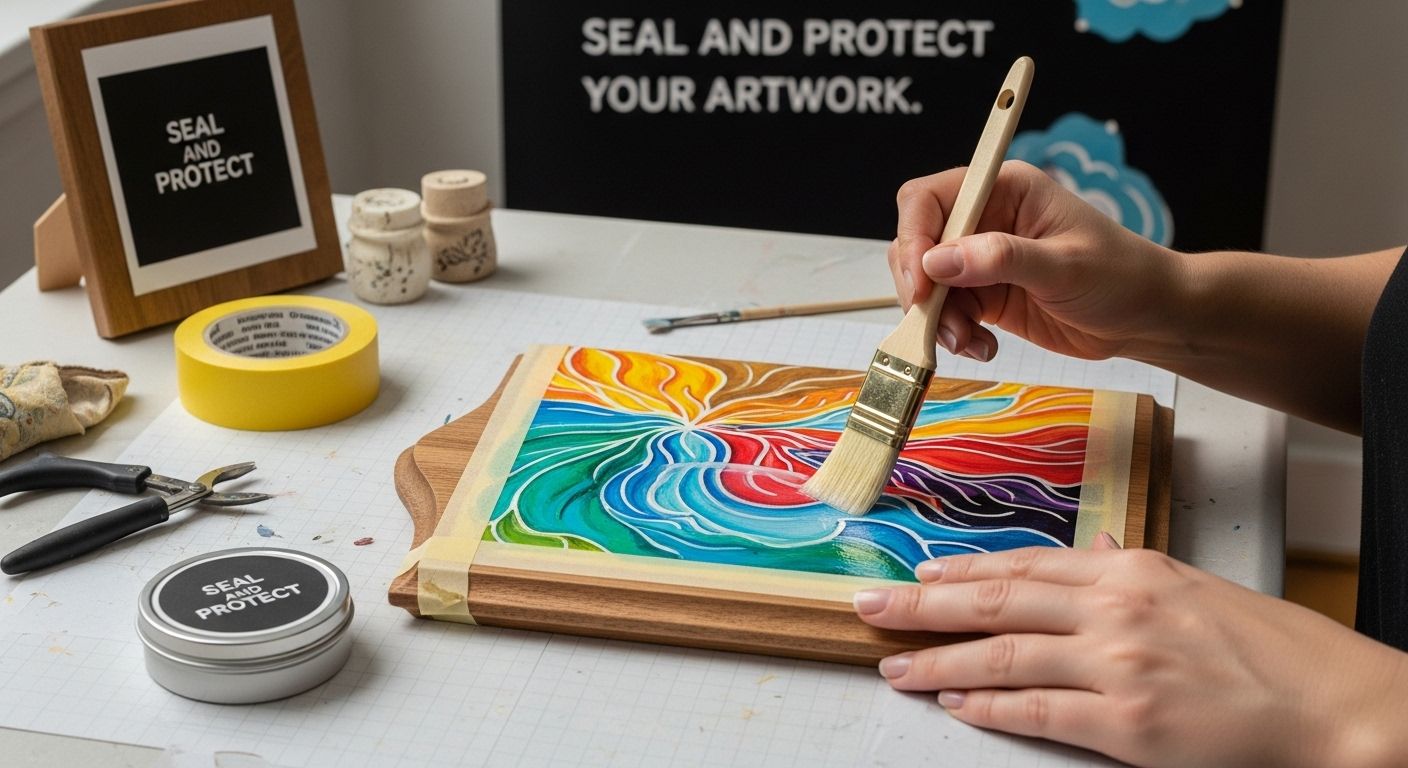
Step 5: Seal and Protect Your Artwork
Sealing your wood painting is the final and crucial step that transforms your creative effort into a lasting piece of art. This protective layer not only enhances the vibrancy of your colors but also shields your artwork from moisture, UV rays, and everyday wear and tear. Without proper sealing, even the most meticulously painted wood piece can deteriorate quickly.
Polyurethane and water-based clear sealants are the most popular choices for wood artwork. Choose a finish that matches your desired aesthetic – matte for a subtle look or glossy for enhanced color depth. Before application, ensure your painted surface is completely dry, typically waiting 24 hours after your final paint layer. Dust the surface gently with a soft, lint-free cloth to remove any particles that might interfere with the sealing process.
Apply the sealant using smooth, long strokes with a high-quality synthetic brush or foam applicator. Work in a well-ventilated area and maintain consistent brush pressure to prevent streaks or bubbles. explore professional sealing techniques for wood crafts to perfect your approach. Most sealants require two to three thin coats for optimal protection, with sufficient drying time between each layer – typically 2-3 hours.
Pay special attention to edges and corners, which are more susceptible to moisture and wear. If your artwork will be displayed in areas with high humidity or direct sunlight, consider using a UV-resistant sealant to prevent color fading. For outdoor pieces or items that might encounter frequent handling, multiple protective layers provide additional durability.
To verify your sealing process is successful, check for these key indicators:
- Smooth, even coating without visible brush marks
- No bubbles, drips, or uneven patches
- Enhanced color vibrancy and depth
- Consistent sheen across the entire surface
Allowing your sealed artwork to cure completely is essential.
Use this handy painting checklist to verify each stage is properly completed for a professional, lasting wood artwork.
| Step | What to Check | How to Verify |
|---|---|---|
| Surface prep | Sanded, clean, dust-free | Surface feels smooth to the hand, no loose particles |
| Priming | Even, complete coverage | Uniform, smooth white or neutral base, no exposed wood |
| Paint application | Multiple, thin, dry layers | Even coverage, no drips; colours look vibrant and strong |
| Detailing | Sharp edges, neat lines | Designs are crisp, no colour bleeding between sections |
| Sealing | Fully coated, clear finish | No bubbles or brush marks, overall sheen is consistent |
| Final cure | Not handled too soon | Wait at least 48 hours before regular use or display |
Bring Your Wood Painting Ideas to Life with Our Craft Tools
Struggling to find the right supplies for flawless wood painting? If sanding, priming and getting smooth coats of colour still feels overwhelming, you are not alone. Many crafters face the challenge of uneven finishes, brush marks and colours that do not pop as beautifully as they imagined. After following our step-by-step guide, you now understand how vital surface preparation, quality paints, and trusted sealing are for a lasting, professional look. Why not give yourself the best chance for success with tools designed for South African crafters just like you?

Explore a world of vibrant art supplies and dedicated crafting essentials from South Africa’s favourite arts & crafts store. Need the right brushes, prep products, or paints for your next masterpiece? Click over to Blue Pea’s online shop now and discover products curated for every creative level. Do not let substandard supplies hold you back from flawless finishes and bold colour. Secure your craft essentials today and watch your next wood painting project shine.
Frequently Asked Questions
What types of wood are best for painting?
Softwoods like pine and cedar are affordable and easy to work with, while hardwoods like oak and maple provide durability and a refined finish. It’s best to avoid wood with knots, warping, or moisture damage.
How do I prepare wood for painting?
Start by sanding the wood surface with medium-grit sandpaper to create a smooth finish. Then, clean off dust with a damp cloth and apply primer if you’re using raw wood to ensure better paint adhesion.
What type of paint should I use for wood crafts?
Acrylic paints are versatile and popular for wood projects due to their quick-drying nature and vibrant colors. For outdoor pieces, consider water-resistant acrylics or oil-based paints for durability.
Why is priming important before painting on wood?
Priming creates a uniform base that helps the paint adhere better, enhances color vibrancy, and prevents issues like uneven absorption and poor coverage. It is essential for achieving a professional finish.
