Transforming old furniture with a stencil can breathe fresh life into forgotten pieces and create one-of-a-kind decor for your home. Most folk just slap on a new coat of paint and call it a day. But did you know that contemporary artisanal furniture design actually champions personal expression and unique transformation through techniques like stenciling. The easiest chair or table you find at a second hand shop might end up as the favourite feature in your lounge if you follow a few clever steps.
Table of Contents
- Step 1: Choose Your Furniture And Design
- Step 2: Gather Your Stenciling Materials
- Step 3: Prepare The Furniture Surface
- Step 4: Apply The Stencil With Precision
- Step 5: Finish And Seal Your Stenciled Design
Quick Summary
| Key Point | Explanation |
|---|---|
| 1. Choose simple furniture pieces | Select items with flat surfaces and minimal details for effective stenciling. Wooden pieces are ideal for paint adhesion. |
| 2. Gather essential stenciling materials | High-quality paints, brushes, and stencils are crucial for a successful finish. Ensure materials fit your design vision and furniture dimensions. |
| 3. Prepare surfaces thoroughly | Clean, sand, and prime your furniture to create a smooth canvas. This ensures paint adherence and a professional look. |
| 4. Apply stencils with precision | Position stencils carefully and use minimal paint for crisp lines. Take your time and clean the stencil between colors to maintain design integrity. |
| 5. Seal your design for durability | Use protective finishes to safeguard your stenciled artwork. Apply in thin layers and allow adequate drying time for best results. |
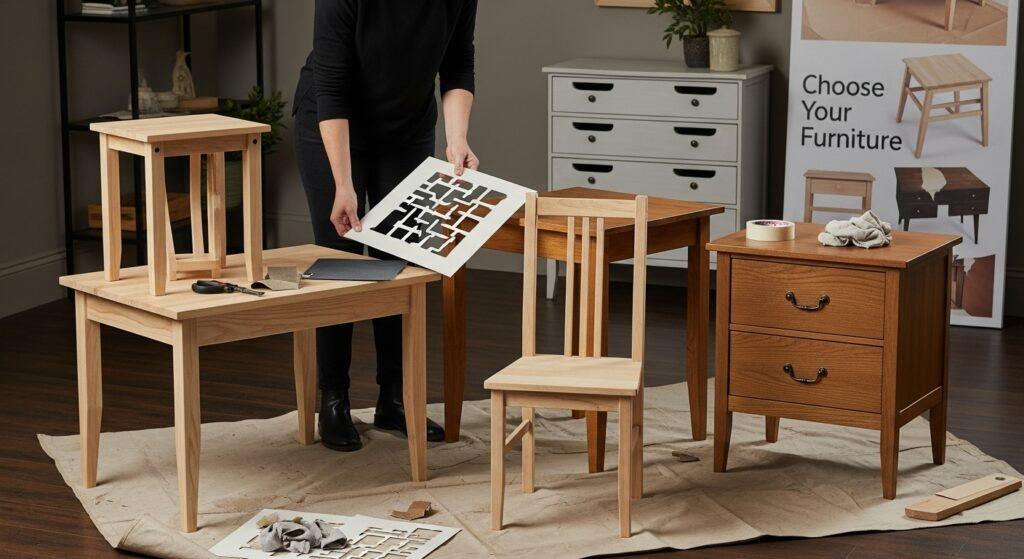
Step 1: Choose Your Furniture and Design
Selecting the right furniture piece is the foundation of successful stenciling furniture ideas. Your choice will determine the overall aesthetic and impact of your creative project. Look for pieces with smooth, clean surfaces that provide an ideal canvas for stencil work.
Ideal Furniture Selection Criteria
When hunting for the perfect furniture item, prioritize pieces with minimal existing detail and a flat surface area. Wooden side tables, plain dressers, chair seats, and basic shelving units work exceptionally well. Avoid heavily textured or intricate furniture that might interfere with your stenciling technique.
Consider the furniture’s current condition and material. Wood surfaces absorb paint most effectively, but metal and laminate can also work with proper preparation. Older pieces from second hand stores or family heirlooms often provide unique opportunities for transformation. Vintage wooden chairs, plain cabinets, and simple bedside tables become extraordinary canvases for your creative vision.
Preparing Your Design Approach
Before purchasing or selecting a piece, visualize your desired outcome. Research design styles that complement your home decor. Do you want a geometric modern pattern, a traditional floral motif, or something more whimsical? Take measurements of your chosen furniture piece and select stencils that proportionally match its dimensions.
According to research from Cape Peninsula University of Technology, contemporary artisanal furniture design emphasizes personal expression and unique transformation. This principle perfectly aligns with stenciling techniques that allow you to reimagine and personalize standard furniture pieces.
Prepare by gathering essential tools before beginning your project. You will need:
- Clean, lint-free cloths
- Mild detergent for surface cleaning
- Sandpaper (medium and fine grit)
- Primer suitable for your furniture material
- Paint brushes or foam rollers
- Painter’s tape
- Stencils matching your design vision
Take time to plan and visualize. A thoughtful approach ensures your stenciling furniture project becomes a stunning, personalized piece of home decor that reflects your unique artistic style.
Below is a handy table summarising the essential tools and materials required for a successful furniture stenciling project, along with their specific purposes and key notes.
| Item | Purpose | Notes |
|---|---|---|
| Lint-free cloths | Cleaning and dust removal | Prevents debris interfering with paint and primer |
| Mild detergent | Surface cleaning | Used before sanding or priming |
| Sandpaper (medium & fine) | Smoothing and preparing the surface | Medium for rough spots, fine for finishing |
| Primer | Creates a uniform, paint-ready base | Choose type suitable for wood, laminate, or metal |
| Paint brushes/foam rollers | Applying paint and stencil designs | Foam rollers ideal for even coverage |
| Painter’s tape | Securing stencil and masking areas | Helps achieve clean edges around stencil |
| Stencils | Creates chosen decorative patterns | Select size and style to match your design vision |
| High-quality paint | Provides durable, long-lasting colour | Acrylic or chalk-based is recommended |
| Drop cloths/newspaper | Protects the work area from spills and splatters | Keeps your workspace tidy and safe |
| Disposable gloves | Protects hands from paint and chemicals | Important for health and easy clean-up |
| Rubbing alcohol | Extra cleaning and surface prep | Useful for stubborn grime |
| Spray adhesive (optional) | Helps to temporarily secure the stencil | Apply sparingly to avoid sticky residue |
Step 2: Gather Your Stenciling Materials
Gathering the right materials is crucial for transforming your furniture with stunning stencil designs. Think of this step as preparing your artistic toolkit, where each item plays a vital role in creating a professional finish. Your material selection will directly impact the quality and durability of your stenciling project.
Essential Painting and Stenciling Supplies
Start by selecting high-quality acrylic or chalk-based paints that adhere well to your chosen furniture surface. Water-based paints work best for most wood and laminate pieces, offering easy cleanup and quick drying times. Choose paint colors that complement your existing home decor and match the design vision you developed in the previous step.
For stencil application, invest in high-quality synthetic brushes and foam rollers. Foam rollers provide smooth, even coverage and minimize paint bleeding underneath the stencil. Density matters – select rollers with a medium to firm foam that allows precise paint distribution. Soft foam brushes work well for delicate detailed designs, while firmer rollers excel on larger surface areas.
Your stencil selection is paramount. Consider PVC stencils with crisp, clean designs that provide clear, sharp edges. Look for stencils made from durable, washable materials that can be reused multiple times. Measure your furniture piece to ensure the stencil pattern fits proportionally and creates the visual impact you desire.
According to research from the Department of Trade, Industry and Competition, innovative design techniques like stenciling contribute to the transformation and personalization of furniture pieces.
Additional materials you will need include:
- Painter’s masking tape
- Disposable gloves
- Drop cloths or old newspapers
- Cleaning rags
- Rubbing alcohol for surface preparation
- Spray adhesive (optional, for securing stencils)
Organize your workspace before beginning. Cover surfaces, wear protective clothing, and ensure good ventilation. A well-prepared workspace prevents accidental spills and makes the stenciling process more enjoyable and efficient. By carefully selecting and preparing your materials, you set the foundation for a successful furniture transformation project.
Step 3: Prepare the Furniture Surface
Preparing your furniture surface is a critical step that determines the success of your stenciling project. Think of this stage as creating the perfect canvas for your artistic vision. A well-prepared surface ensures smooth paint application, better stencil adhesion, and a professional-looking final result.

Cleaning and Surface Assessment
Begin by thoroughly cleaning the furniture piece. Remove all dust, dirt, and grime using a degreasing cleaner or a mixture of mild detergent and warm water. For wooden surfaces, use a soft cloth and work in the direction of the wood grain. Pay special attention to corners, crevices, and areas with accumulated grime. Thorough cleaning prevents paint adhesion issues and ensures a smooth, even finish.
After cleaning, inspect the surface carefully. Look for imperfections like scratches, dents, or uneven areas. For wooden furniture, light sanding can help create a smooth base and improve paint adhesion. Use medium-grit sandpaper to gently sand the entire surface, focusing on smoothing out rough spots. Wipe away sanding dust with a tack cloth or slightly damp rag to create a clean working surface.
According to regulations concerning hazardous substances in paint materials, it is crucial to use safe and compliant materials during your furniture preparation process. Choose paints and primers that meet safety standards and are appropriate for your specific furniture material.
Priming is an essential step that many DIY enthusiasts overlook. Apply a primer compatible with both your furniture material and the paint you will use. Primer creates a uniform surface and helps the paint adhere more effectively. For wooden surfaces, use a wood primer. For laminate or metal, select a primer specifically designed for those materials.
Prepare your workspace with the following items:
- Drop cloths or plastic sheeting
- Painter’s tape
- Disposable gloves
- Cleaning rags
- Sandpaper (medium and fine grit)
- Tack cloth
- Primer appropriate for your furniture material
Allow the primer to dry completely according to the manufacturer’s instructions. The surface should feel smooth and uniform to the touch. Run your hand gently over the primed surface to check for any remaining rough spots. A well-prepared surface will provide the perfect foundation for your stenciling project, ensuring crisp, clean lines and a professional finish that transforms your furniture into a unique piece of art.
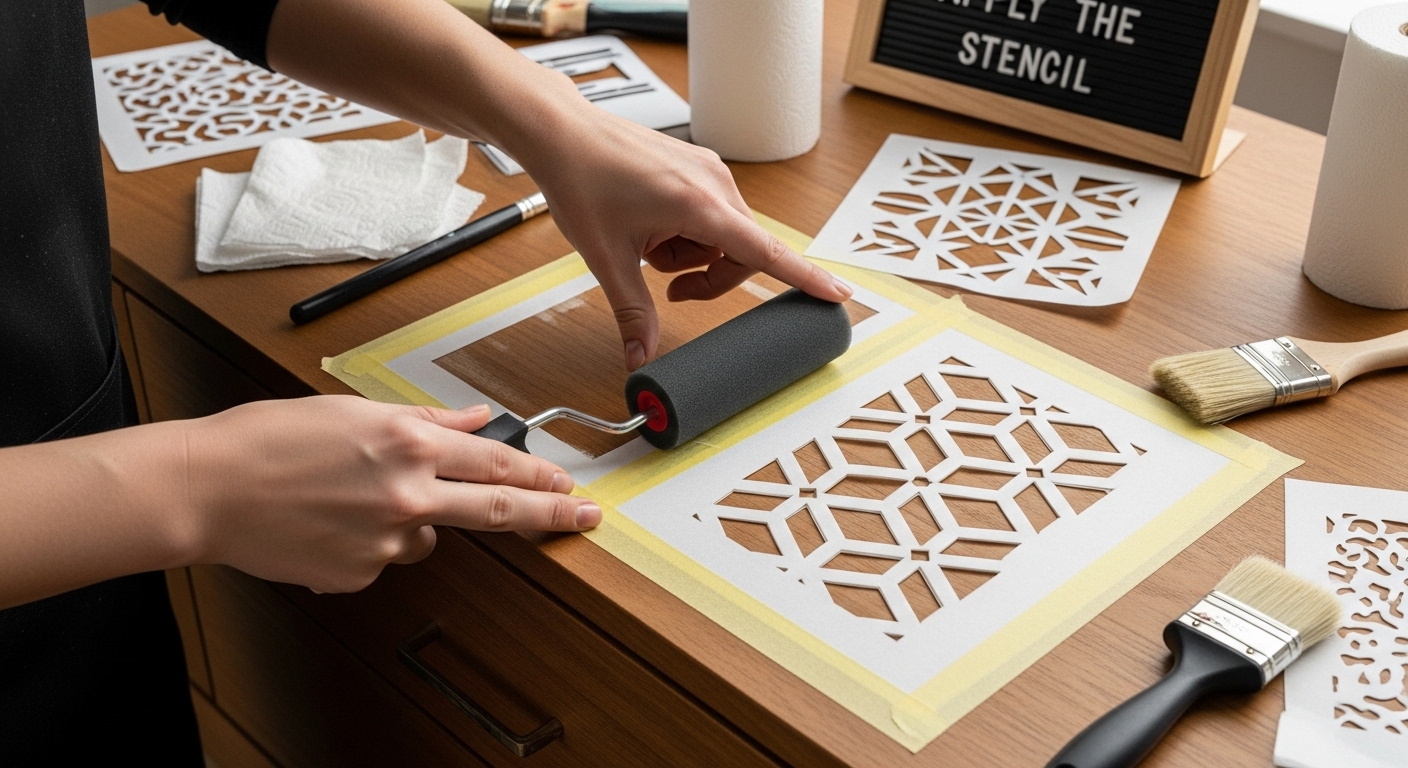
Step 4: Apply the Stencil with Precision
Stencil application is the moment where your creative vision transforms from concept to reality. This step requires patience, steady hands, and a meticulous approach to achieving a professional-looking design. The key is to work slowly and deliberately, ensuring each element of your stencil is perfectly positioned and applied.
Positioning and Securing the Stencil
Begin by carefully positioning your stencil on the prepared furniture surface. Precision is paramount – take time to align the design exactly where you want it. For complex or repeated patterns, use painter’s tape to temporarily secure the stencil in place. Some crafters prefer using repositionable spray adhesive for additional stability, but be cautious and apply sparingly to prevent residue buildup.
Technique matters more than speed. Hold your stencil firmly against the surface, ensuring all edges are flat and there are no gaps that could cause paint bleeding. Minimal paint application is the secret to crisp, clean lines. Load your foam roller or brush with a small amount of paint, then offload excess onto a paper towel. You want a nearly dry brush or roller – just enough paint to create color without overwhelming the stencil.
Apply paint using a gentle, perpendicular dabbing or rolling motion. Avoid brushing or sweeping, which can cause paint to seep underneath the stencil. Work from the edges toward the center of the stencil design. If using multiple colors, clean your stencil thoroughly between color changes to maintain design integrity.
According to design registration guidelines from the Companies and Intellectual Property Commission, precision in design application is crucial. This principle applies perfectly to stenciling, where attention to detail can transform an ordinary piece of furniture into a unique work of art.
Potential challenges to watch for include:
- Paint bleeding under the stencil edges
- Uneven paint coverage
- Smudging or accidental movement of the stencil
- Color saturation inconsistencies
After completing each stencil application, carefully lift the stencil straight up to prevent smudging. Check your work immediately and keep cleaning materials nearby to address any mistakes quickly. Allow each section to dry completely before repositioning the stencil for repeated patterns or additional design elements.
Take a step back periodically to view your work from different angles. This helps ensure symmetry and overall design cohesion.
Below is a quick troubleshooting table to address common challenges faced during furniture stenciling, with their possible causes and practical solutions.
| Problem | Possible Cause | Solution |
|---|---|---|
| Paint bleeding under stencil | Too much paint/loose stencil | Use less paint, secure stencil with tape or adhesive |
| Uneven paint coverage | Inconsistent application | Apply paint in thin, even layers; repeat if needed |
| Smudging or blurred edges | Stencil moved during painting | Hold stencil firmly, avoid brushing sideways |
| Colour saturation inconsistencies | Excess paint in roller/brush | Offload excess paint before applying to stencil |
| Bubbling after sealing | Thick sealer application | Apply sealant in thin layers, let each coat dry |
| Visible brush strokes in finish | Poor technique/low quality brush | Use high-quality synthetic brush, smooth strokes |
| Stencil pattern doesn’t align | Poor initial positioning | Measure and check alignment before painting |
Step 5: Finish and Seal Your Stenciled Design
The final step of your stenciling project transforms your creative effort into a durable, professional-looking piece of furniture. Sealing your design protects the intricate stencil work from everyday wear and tear, ensuring your artistic creation remains vibrant and intact for years to come.
Selecting the Right Protective Finish
Choose a clear protective finish that complements your paint type and furniture material. Water-based polyurethane works excellently for most interior furniture pieces, providing a clear, non-yellowing protection that preserves your stencil design’s original colors. For furniture that experiences heavy use, consider a more robust protective coating like a clear acrylic sealer or furniture-grade clear coat.
Apply the protective finish using smooth, even strokes. Thin, multiple layers are superior to one thick application. This approach prevents bubbling, ensures even coverage, and allows each layer to dry completely. Use a high-quality synthetic brush or foam applicator to minimize visible brush strokes. Work in a well-ventilated area and apply the sealer in the same direction to maintain a consistent appearance.
Allow sufficient drying time between coats. Typically, water-based sealers require two to three hours of drying time, while oil-based products might need 24 hours between applications. Follow the manufacturer’s specific instructions carefully. Patience during this stage is crucial to achieving a smooth, professional finish.
According to innovative coating system approvals by Agrment South Africa, selecting the right protective coating is essential for maintaining surface durability and aesthetic quality.
Consider these final verification steps:
- Check for any uneven sealer application
- Ensure complete coverage of the stenciled design
- Verify no visible brush strokes or bubbling
- Test the surface’s hardness after final coat
Once the final protective layer has completely dried, inspect your work from multiple angles and under different lighting conditions. Look for any imperfections or areas that might need touch-ups. Run your hand gently over the surface to confirm a smooth, even finish. Your stenciled furniture piece is now protected and ready to become a stunning focal point in your home decor.
Remember that proper maintenance will extend the life of your beautifully stenciled furniture. Avoid placing hot items directly on the surface, use coasters, and clean gently with a soft, slightly damp cloth to preserve the intricate design and protective seal.
Bring Your Stenciling Furniture Ideas to Life with South Africa’s Best Craft Supplies
Dreaming of unique furniture but facing challenges with finding the right tools, durable stencils, or paints that really bring your vision to life? You are not alone. Many South African crafters struggle to find quality, reusable materials that deliver crisp, professional stencil results, especially when upcycling or transforming second-hand furniture. Whether you want a bold geometric pattern or classic florals, your creativity deserves a trustworthy partner.
Discover the possibilities at South Africa’s largest online arts & crafts store. Unlock access to premium PVC stencils, durable paints and all the essentials for a flawless finish. No more settling for mediocre supplies or hit-and-miss results.

Ready to create a show-stopping piece that truly represents your style? Visit https://bluepeaonline.co.za now and get everything you need in one place. Transform ideas from your sketchbook into real, lasting furniture art today with supplies that make every step easier and more rewarding. Your next creative masterpiece starts right here.
Frequently Asked Questions
What type of furniture is best for stenciling projects?
Look for furniture pieces with smooth, clean surfaces and minimal existing detail, such as wooden side tables, plain dressers, and simple shelving units. Avoid heavily textured or intricate furniture that might interfere with the stenciling technique.
How do I prepare the surface before stenciling?
Start by cleaning the furniture thoroughly to remove dust and grime. Lightly sand the surface to smooth out imperfections and improve paint adhesion. Use a suitable primer for your furniture material to create a uniform base before applying the stencil.
What type of paint is recommended for stenciling furniture?
High-quality acrylic or chalk-based paints are ideal because they adhere well to wood and laminate surfaces. Water-based paints are often preferred for their easy cleanup and quick drying times.
How can I prevent paint bleeding under the stencil?
To prevent bleeding, use minimal paint on your brush or roller, offloading excess paint onto a paper towel. Apply the paint in a gentle dabbing or rolling motion, and ensure the stencil is properly secured to avoid movement during application.
